
Agilent USB-GPIB 82357B on Windows11
1st version 10/07/2026
General
This guide describes how to install and use an Agilent USB-GPIB Interface 82357B adapter on Windows 11 using Keysight IO Libraries Suite.
The Agilent USB-GPIB 82357B can be used simply by installing the Keysight IO Libraries Suite software package.
The installation is straightforward and does not require any adapter-specific driver modifications.
Several standard graphical utility applications are installed together with the library, allowing you to easily check the operation of the GPIB adapter and connected GPIB devices.
Some simple examples of how to use these utilities are provided below for reference.
Configurations
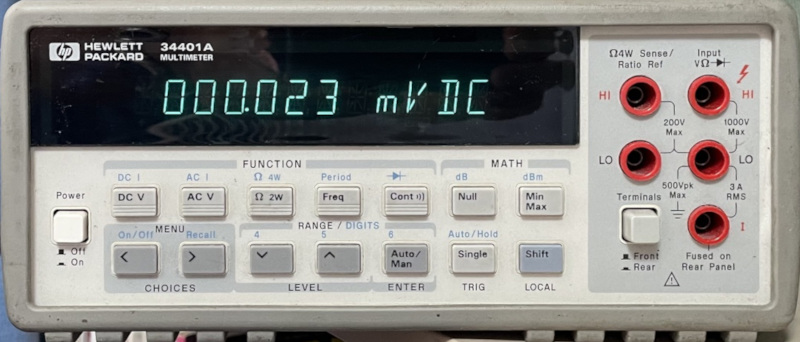
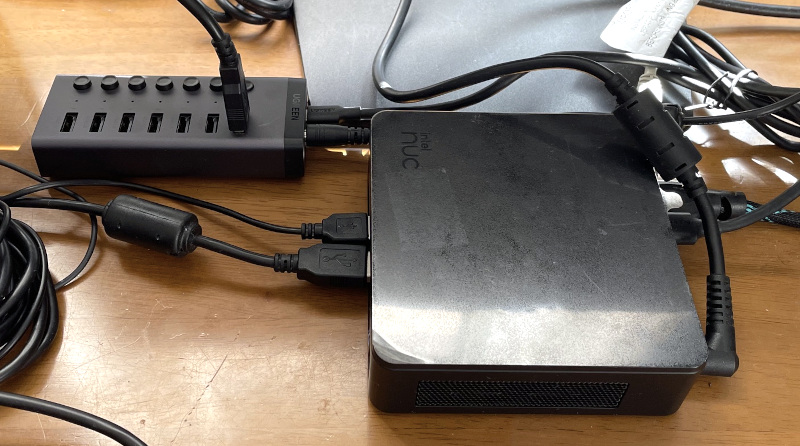
HP EliteDesk 800
- i5-10600K – 16GB RAM – Intel UHD Graphics 630 (onboard)
- Windows 11-Pro 25H2, Clean-installation
- IOLibrariesSuite-21.3.293, Python 3.14.7
HP ENVY 17t-s100
- Intel Core i7-6700HQ – 16 GB RAM – Intel HD Graphics 530
- Windows 11-Home 25H2
- IOLibrariesSuite-21.4.204, Python 3.14.5
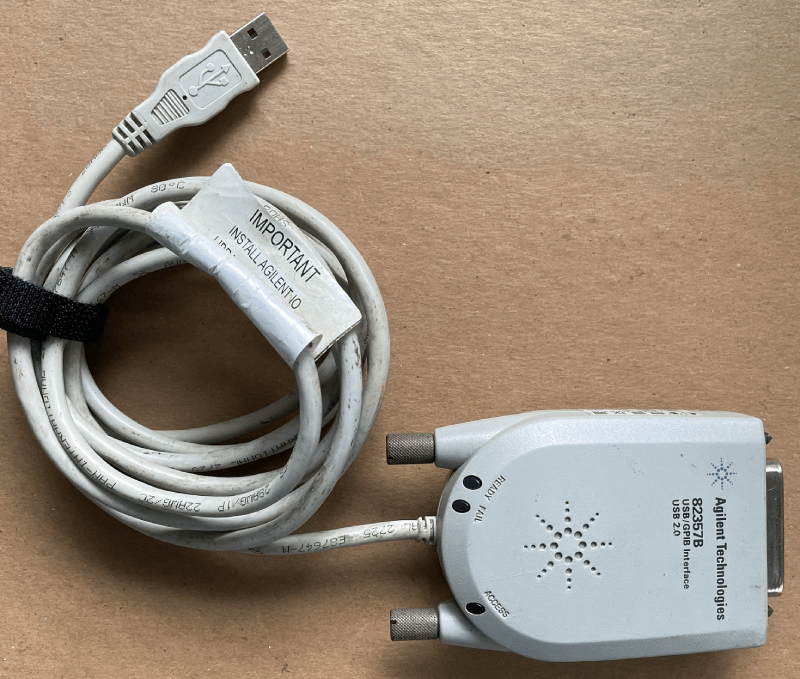
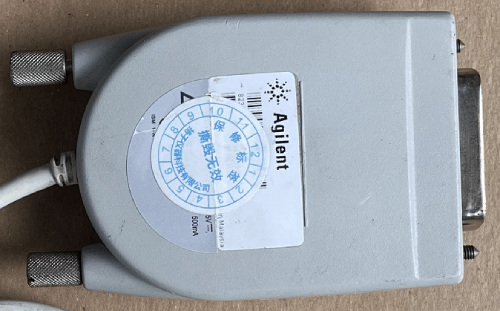
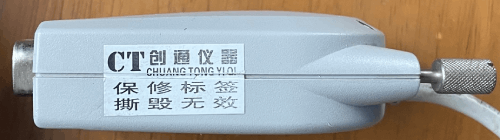
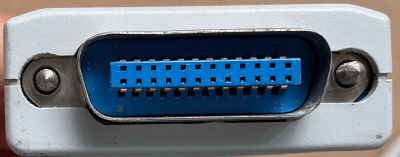
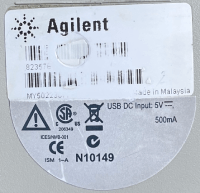
USB-GPIB Adapter: Agilent USB-GPIB Interface 82357B
This adapter was purchased as a used item from an eBay seller named “zecenke-5” for $50 in June 2026.
“Keysight IO Libraries Suite” Installation
1. Download IO Libraries Suite
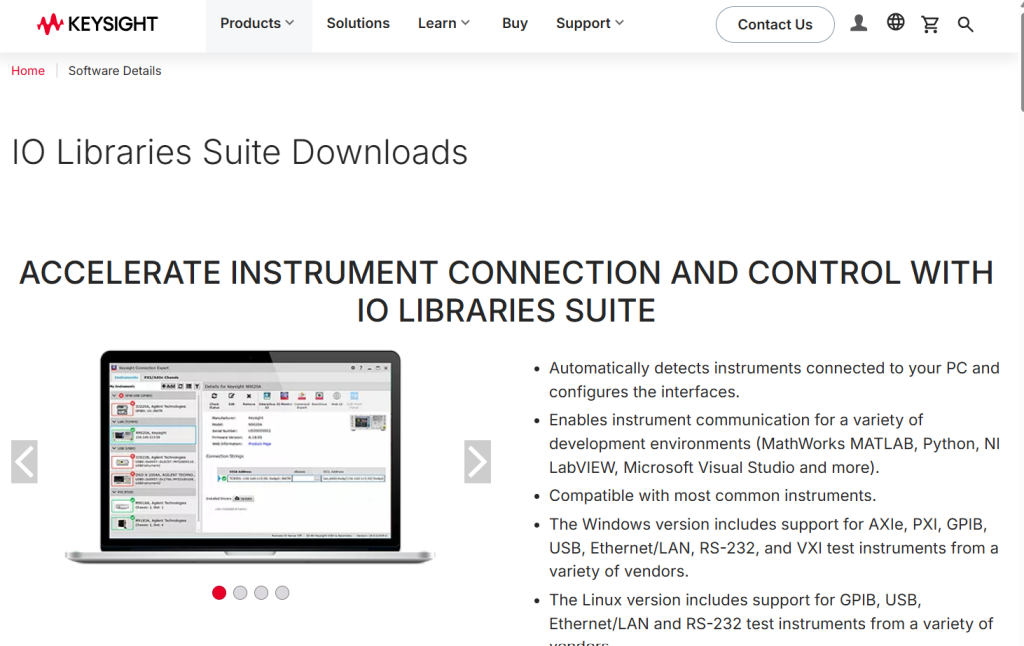
Press this button to download

File:

2. Installation
Disconnect the GPIB adapter’s USB cable from the PC before starting the installation.
Double-click the application in the Downloads folder.
Next, Accept and Next, Next, Next.
The installation takes about 5 minutes.
Next, Finish.
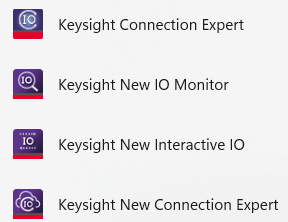
The drivers and four applications were installed.
Reboot Windows
3. Check
Connect the 82357B to the GPIB instrument and turn on the instrument.
Connect the USB cable to a USB port on the PC.
3-1. Check Device Manager
The 82357B should appear in Device Manager as shown below:

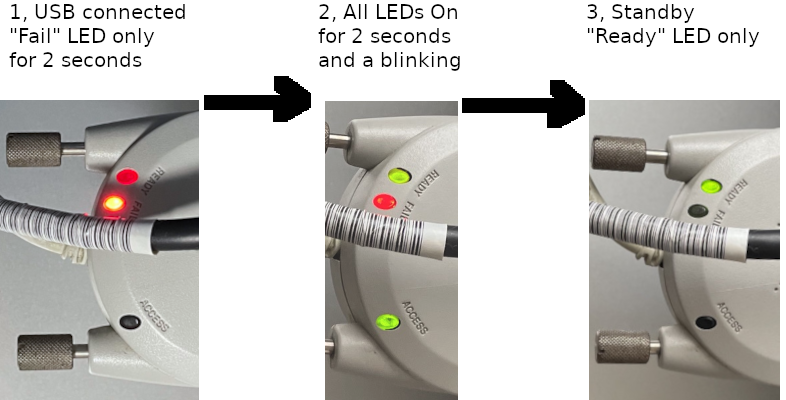
3-2. Check LEDs on 82357B
Immediately after the USB cable is connected, only the FAIL (red) LED lights up for a few seconds.
Then, the READY (green), FAIL (red), and ACCESS (green) LEDs all remain lit for about 10 seconds.
Finally, only the READY LED remains lit, indicating the normal standby state in which the device is ready for use.
The installation of Keysight IO Libraries Suite was completed.
The drivers for the 82357B, along with several utility programs, have now been installed. The 82357B is now ready for use.
3-3. Precautions When Using Multiple GPIB Adapters
- If you subsequently install NI-488.2, you can also use an NI GPIB-USB-HS on the same operating system and switch between the two GPIB adapters as needed.
- When both NI-488.2 and Keysight IO Libraries Suite are installed, the Keysight 82357B may be assigned to
GPIB1instead ofGPIB0. Check the VISA resource string in “Keysight Connection Expert” before running the Python program. In my test, using the wrong GPIB interface number resulted in the following error:
pyvisa.errors.VisaIOError:VI_ERROR_ALLOC Insufficient system resources…..
Keysight Utility Applications
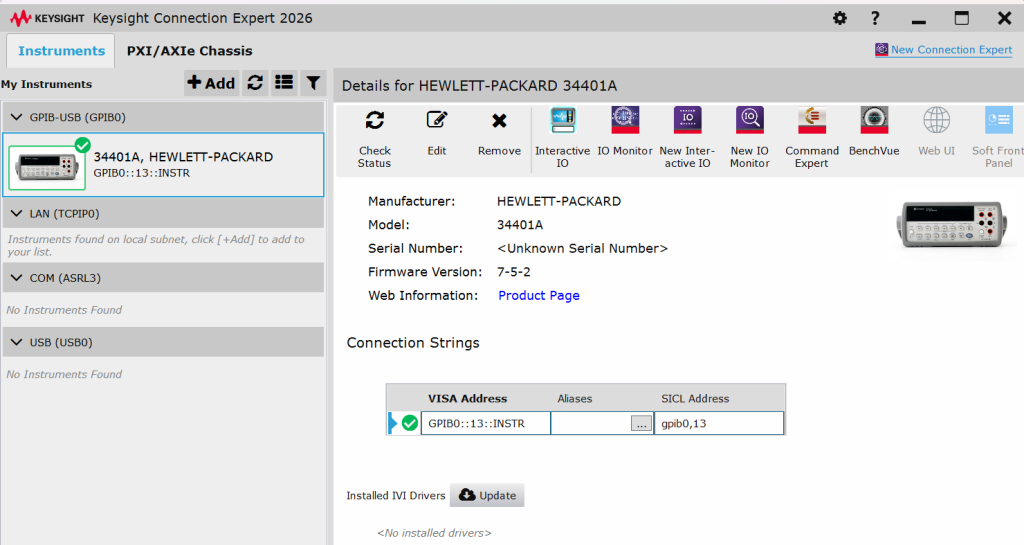
1. View GPIB Devices with “Connection Expert”

Keysight Connection Expert detects and displays the USB-GPIB adapter and GPIB devices such as DMMs.
This application is useful for checking the detected GPIB interface number (for example, GPIB0) and the GPIB address of each instrument (for example, 13).
Check the GPIB interface number. If it is GPIB1 instead of GPIB0, change the interface number in the Python source code accordingly.
The VISA resource string, such as GPIB0::13::INSTR, is used in Python applications.
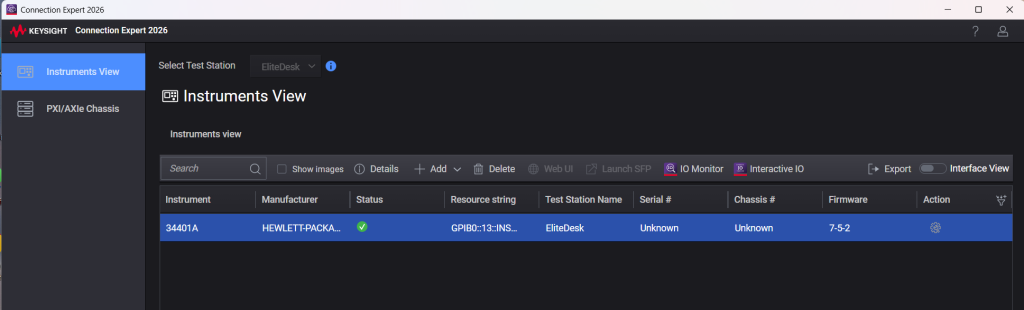
2. View GPIB Devices and Test Communication with “New Connection Expert”

This is the new version of Keysight Connection Expert.
This application is useful for checking the detected GPIB interface number (for example, GPIB0) and the GPIB address of each instrument (for example, 13).
Check the GPIB interface number. If it is GPIB1 instead of GPIB0, change the interface number in the Python source code accordingly.
The VISA resource string, such as GPIB0::13::INSTR, is used in Python applications.
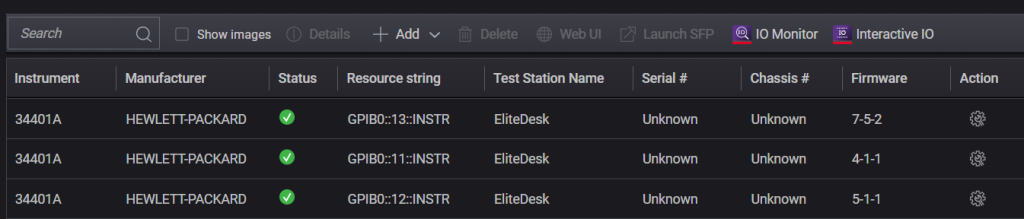
2-1. Display GPIB Device List
The automatically detected USB-GPIB devices are displayed:
When connecting 3 devices:
2-2. Action Dropdown List
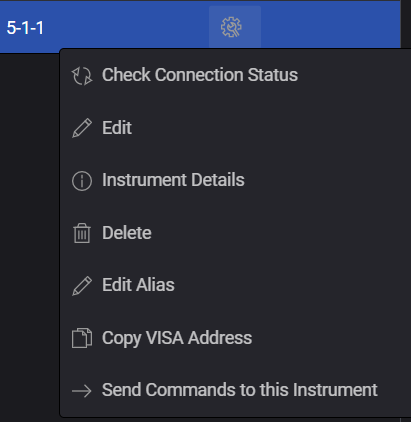
An Action button is provided for each device in this version. Click the button to display the dropdown list.
Action button dropdown list:
2-3. Test Communication with Action – Send & Read
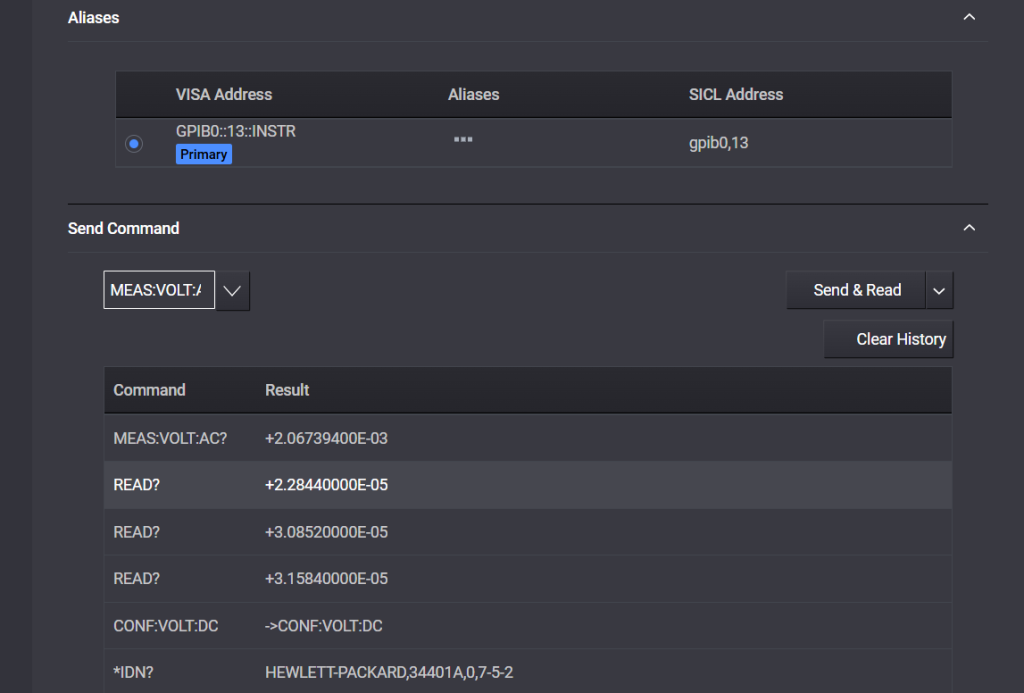
Commands can be sent and responses can be viewed directly from the GUI.
Action – Send & Read sample:
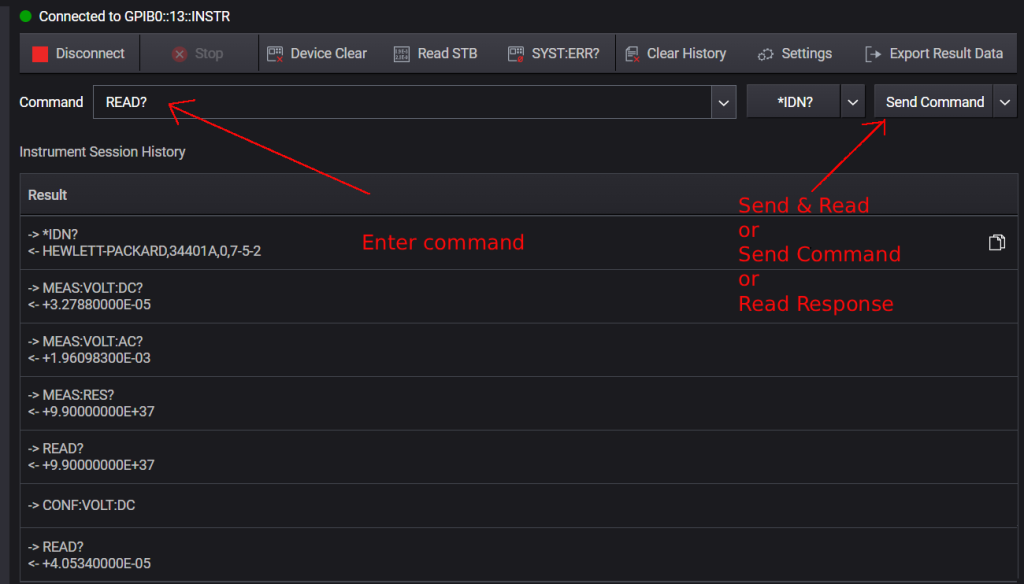
2-4. Useful HP 34401A Commands for Action - Send & Read
| Command | Description | Button |
|---|---|---|
*IDN? | Queries the instrument identification information HEWLETT-PACKARD,34401A,0,7-5-2 | Send & Read |
MEAS:VOLT:DC? | Measures DC voltage and returns the measured value received string: ‘+5.25970000E-05’ | Send & Read |
MEAS:VOLT:AC? | Measures AC voltage and returns the measured value received string: ‘+1.80423900E-03’ | Send & Read |
MEAS:RES? | Measures resistance and returns the measured value received string: ‘+1.00052360E+06’ | Send & Read |
CONF:VOLT:DC | Configures the DMM for DC voltage measurement | Send |
CONF:VOLT:AC | Configures the DMM for AC voltage measurement | Send |
CONF:RES | Configures the DMM for resistance measurement | Send |
READ? | Performs a measurement using the current configuration | Send & Read |
*RST | Resets the instrument to its default settings | Send |
*CLS | Clears the instrument status registers | Send |
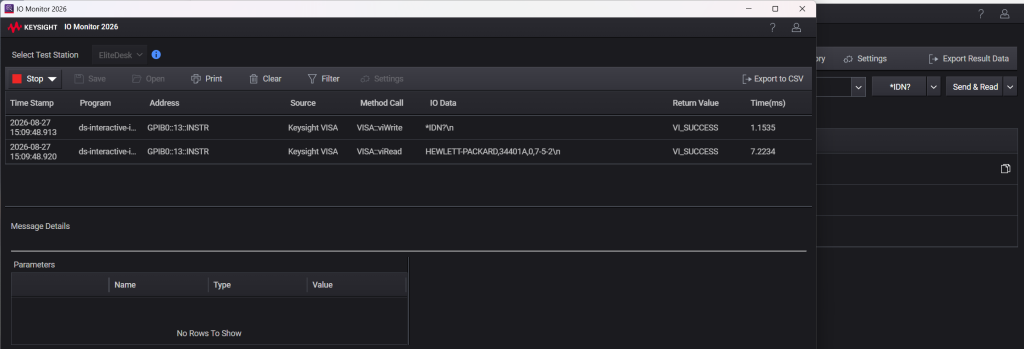
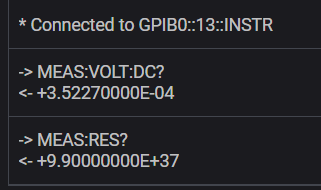
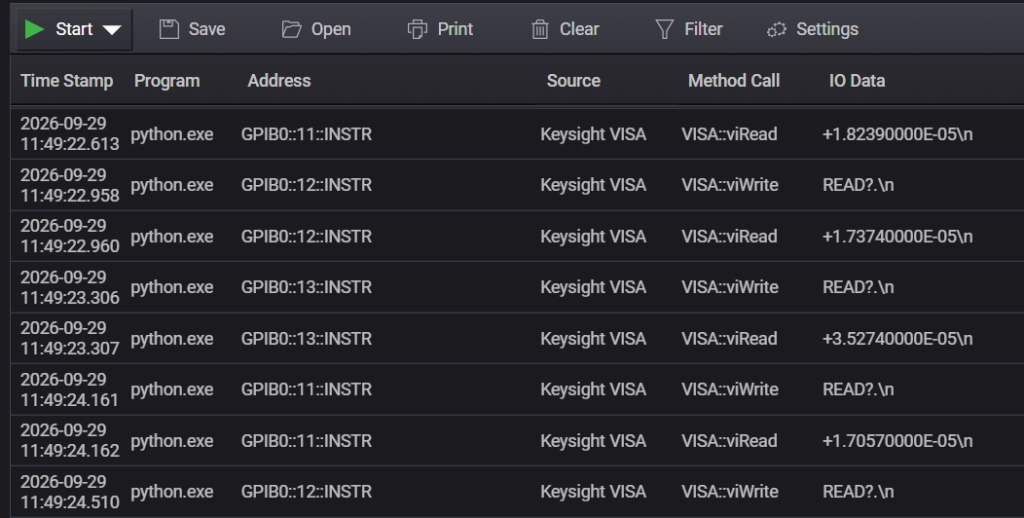
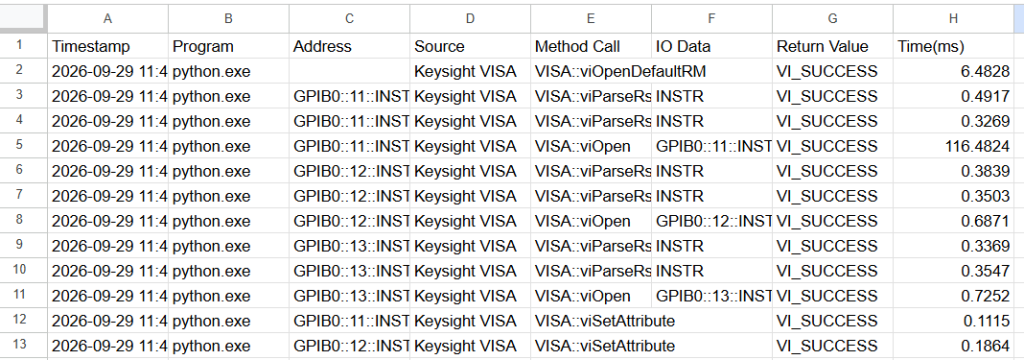
3. Capture Communication with “New IO Monitor”
Keysight New IO Monitor can capture the GPIB communication sequence.
IO Monitor captures GPIB communication at the software API level. It records calls to IO Suite and VISA functions, including commands, responses, parameters, and return values. It does not capture raw USB packets or electrical signals on the GPIB bus.
*IDN? command of Interactive-IO capture sample:
Measurement commands of Interactive-IO capture sample:
Python app dmm3-gui-graph-record.py capture sample:
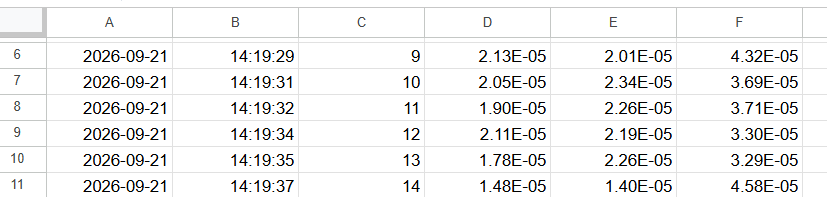
The capture record can be stored to CSV file:
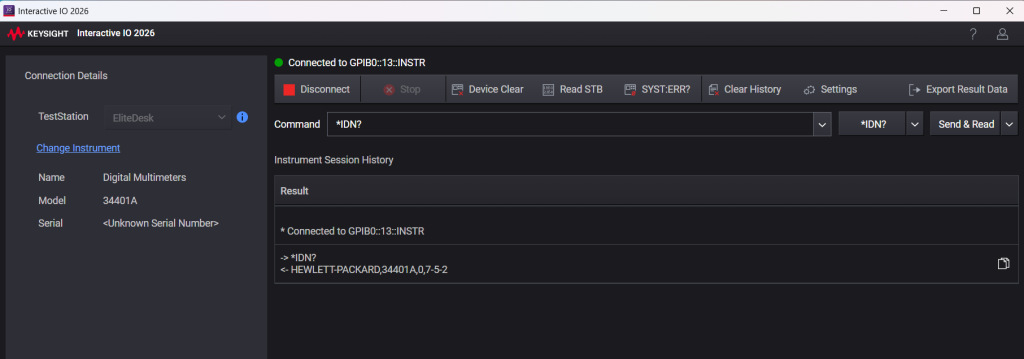
4. Test Communication with “New Interactive IO”

New Interactive IO is essentially the Keysight IO Libraries Suite equivalent of ibtest on Linux.
It provides a simple way to verify communication with a GPIB instrument without writing a program.
How to use
- Double-click the New Interactive IO icon.
- Click the “Change Instrument” link in the left pane.
- Select an instrument in the pop-up window and click Connect.
*IDN? command of New Interactive-IO sample:
Some commands and responses of New Interactive-IO sample:
Test with Python and PyVISA
1. Install Python and PyVISA
1-1. Download Python and Install
Download Python from here: https://www.python.org/downloads/

Install
- Choose version; in this example, I selected Python 3.13.
- Update setting now? [y/N] y
- Add commands directory to your PATH now? [y/N] y
- Install CPython now? [Y/n] y
Check the installed Python version:
python --version
Python 3.14.7 (Updated automatically to 3.14)
✎ Note
Although I initially selected Python 3.13, the installed version was Python 3.14.7. This appears to have occurred because I answered y to “Update setting now?” during installation.
1-2. Install PyVISA
PyVISA is a Python library that provides access to VISA-compatible instruments.
Install PyVISA after installing Python:
python -m pip install pyvisa
2. Test GPIB Interactively with Python
Start the Python interactive mode with the following command:
python
You can send a query directly to the GPIB device and receive the response without creating a Python script file.
✎ Note
Change the GPIB Interface Number and GPIB Address to match your instrument.
The interface number is usually GPIB0, but it may be GPIB1 on Windows depending on your environment.
The GPIB address is 13 in the next sample.
Paste the following code at the >>> prompt:
import pyvisa
rm=pyvisa.ResourceManager()
inst=rm.open_resource('GPIB0::13::INSTR')
print(inst.query('*IDN?'))
inst.close()
rm.close()
Press Enter to execute the code. The instrument ID will then be displayed:
HEWLETT-PACKARD,34401A,0,7-5-2
Enter quit() to exit Python.
3. Python CLI app for single 34401A
3-1. File
File name: dmm1-cli.py
Download here: https://github.com/moriyasum/GPIB
✎ Note
Change the GPIB address in the source to match your instrument.
The interface number is usually GPIB0, but it may be GPIB1 on Windows depending on your environment.
The GPIB address is 13 in the next sample.
3-2. Execution:
python .\dmm1-cli.py
3-3. Output
Interface:  GPIB0 , GPIB address:  13
Instrument ID:  HEWLETT-PACKARD,34401A,0,7-5-2
0 DC Voltage = +3.65830000E-05 V
1 DC Voltage = +5.06870000E-05 V
2 DC Voltage = +4.25880000E-05 V
3 DC Voltage = +5.31860000E-05 V
4 DC Voltage = +4.21300000E-05 V
3-4. Python Source Code
import pyvisa
import time

# GPIB address, Interface number
adr = "13"
interface = "GPIB0"

# Open VISA
rm = pyvisa.ResourceManager()
dmm = rm.open_resource(f"{interface}::{adr}::INSTR")
dmm.timeout = 5000

# Read instrument ID
print("Interface: ", interface, ", GPIB address: ", adr)
print("Instrument ID: ", dmm.query("*IDN?").strip())

for i in range(5):   # set number of loop
    # Configure the DMM for DC voltage measurement
    dmm.write("CONF:VOLT:DC")

    # Take a measurement
    value = dmm.query("READ?")
    print(i, "DC Voltage =", value.strip(), "V")

    time.sleep(2)

# Close the instrument
dmm.close()
rm.close()
4. Python GUI Simple App for 1x 34401A
4-1. File
File name: dmm1-gui.py
Download here: https://github.com/moriyasum/GPIB
✎ Note
Change the GPIB address in the source to match your instrument.
The interface number is usually GPIB0, but it may be GPIB1 on Windows depending on your environment.
The GPIB address is 13 in the next sample.
4-2. Execution:
python .\dmm1-gui.py
4-3. Output
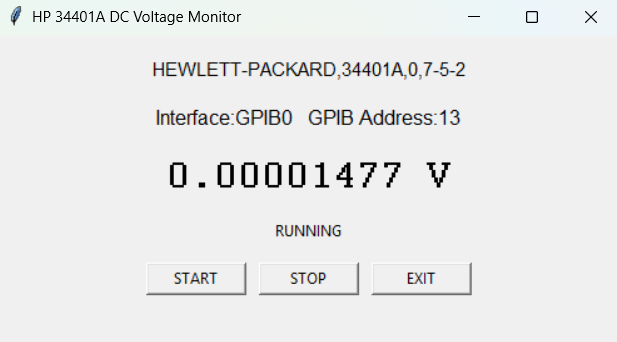
4-4. Python Source Code
import tkinter as tk
import pyvisa

# GPIB address, Interface number
adr = "13"
interface = "GPIB0"

# Open VISA
rm = pyvisa.ResourceManager()
dmm = rm.open_resource(f"{interface}::{adr}::INSTR")
dmm.timeout = 5000

# Read instrument ID
idn = dmm.query("*IDN?").strip()
# Set to Configure DC-V measurement mode
dmm.write("CONF:VOLT:DC")

# GUI
root = tk.Tk()
root.title("HP 34401A DC Voltage Monitor")
root.geometry("500x250")

running = False

voltage_text = tk.StringVar(value="-------- V")
status_text = tk.StringVar(value="STOPPED")


def measure():
    if not running:
        return

    try:
        voltage = float(dmm.query("READ?"))
        voltage_text.set(f"{voltage:.8f} V")
        status_text.set("RUNNING")
    except Exception as e:
        status_text.set("ERROR: " + str(e))

    if running:
        root.after(500, measure)


def start():
    global running

    if not running:
        running = True
        measure()


def stop():
    global running

    running = False
    status_text.set("STOPPED")


def close():
    dmm.close()
    rm.close()
    root.destroy()


tk.Label(
    root,
    text=idn,
    font=("Arial", 11)
).pack(pady=15)

tk.Label(
    root,
    text=f"Interface:{interface}   GPIB Address:{adr}",
    font=("Arial", 12)
).pack()

tk.Label(
    root,
    textvariable=voltage_text,
    font=("Courier", 28, "bold")
).pack(pady=15)

tk.Label(
    root,
    textvariable=status_text
).pack()

button_frame = tk.Frame(root)
button_frame.pack(pady=15)

tk.Button(
    button_frame,
    text="START",
    command=start,
    width=10
).pack(side="left", padx=5)

tk.Button(
    button_frame,
    text="STOP",
    command=stop,
    width=10
).pack(side="left", padx=5)

tk.Button(
    button_frame,
    text="EXIT",
    command=close,
    width=10
).pack(side="left", padx=5)

root.protocol("WM_DELETE_WINDOW", close)

root.mainloop()
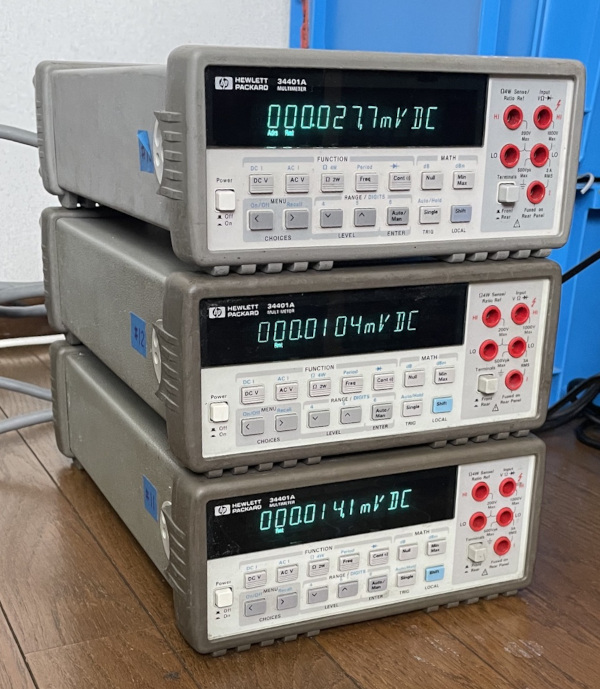
5. Python CLI App for 3x 34401A
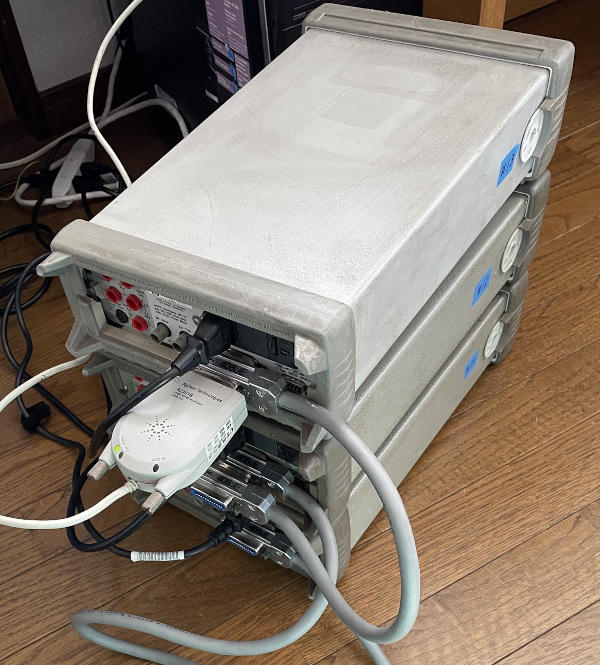
34401A x 3, GPIB address=11,12,13
5-1. File
File name: dmm3-cli.py
Download here: https://github.com/moriyasum/GPIB
✎ Note
Change the GPIB address in the source to match your instrument.
The interface number is usually GPIB0, but it may be GPIB1 on Windows depending on your environment.
The GPIB address is 13 in the next sample.
5-2. Execution:
python .\dmm3-cli.py
5-3. Output
Interface:GPIB0
Instrument 1: Addr=11  HEWLETT-PACKARD,34401A,0,4-1-1
Instrument 2: Addr=12  HEWLETT-PACKARD,34401A,0,5-1-1
Instrument 3: Addr=13  HEWLETT-PACKARD,34401A,0,7-5-2
0 DC Volt: 11= +1.87790000E-05 V, 12= +2.36160000E-05 V, 13= +5.30810000E-05 V
1 DC Volt: 11= +2.15320000E-05 V, 12= +2.77230000E-05 V, 13= +5.66400000E-05 V
2 DC Volt: 11= +2.97650000E-05 V, 12= +3.68070000E-05 V, 13= +4.06650000E-05 V
3 DC Volt: 11= +2.49260000E-05 V, 12= +3.44870000E-05 V, 13= +4.64610000E-05 V
4 DC Volt: 11= +1.94830000E-05 V, 12= +2.88770000E-05 V, 13= +5.49390000E-05 V
5 DC Volt: 11= +2.34430000E-05 V, 12= +2.89390000E-05 V, 13= +4.86330000E-05 V
6 DC Volt: 11= +2.75530000E-05 V, 12= +3.59260000E-05 V, 13= +4.76780000E-05 V
7 DC Volt: 11= +2.59310000E-05 V, 12= +3.61620000E-05 V, 13= +4.58460000E-05 V
8 DC Volt: 11= +1.89050000E-05 V, 12= +2.74250000E-05 V, 13= +5.62350000E-05 V
9 DC Volt: 11= +2.34680000E-05 V, 12= +2.69790000E-05 V, 13= +5.36700000E-05 V
5-4. Python Source Code
import pyvisa
import time

# GPIB addresses, Interface number
adr1 = "11"
adr2 = "12"
adr3 = "13"
interface = "GPIB0"

# Open VISA
rm = pyvisa.ResourceManager()
dmm1 = rm.open_resource(f"{interface}::{adr1}::INSTR")
dmm1.timeout = 5000
dmm2 = rm.open_resource(f"{interface}::{adr2}::INSTR")
dmm2.timeout = 5000
dmm3 = rm.open_resource(f"{interface}::{adr3}::INSTR")
dmm3.timeout = 5000

print(f"Interface:{interface}")
# Read instrument ID
print(f"Instrument 1: Addr={adr1} ", dmm1.query("*IDN?").strip())
print(f"Instrument 2: Addr={adr2} ", dmm2.query("*IDN?").strip())
print(f"Instrument 3: Addr={adr3} ", dmm3.query("*IDN?").strip())

# Set to Configure DC-V measurement mode
dmm1.write("CONF:VOLT:DC")
dmm2.write("CONF:VOLT:DC")
dmm3.write("CONF:VOLT:DC")

for i in range(10):   # Set how many sampling times
    # Send READ command and print out the value
    value = dmm1.query("READ?")
    print(i, "DC Volt:", adr1+ "=", value.strip(), "V, ", end="")

    value = dmm2.query("READ?")
    print(adr2+ "=", value.strip(), "V, ", end="")

    value = dmm3.query("READ?")
    print(adr3+ "=", value.strip(), "V")

    time.sleep(0.5)

# Close the instrument
dmm1.close()
dmm2.close()
dmm3.close()
rm.close()
6. Python GUI app for 3x 34401A Data Logger
6-1. File
File name: dmm3-gui-graph-record.py
Download here: https://github.com/moriyasum/GPIB
✎ Note
Change the GPIB address in the source to match your instrument.
The interface number is usually GPIB0, but it may be GPIB1 on Windows depending on your environment.
The GPIB address is 13 in the next sample.
6-2. Execution:
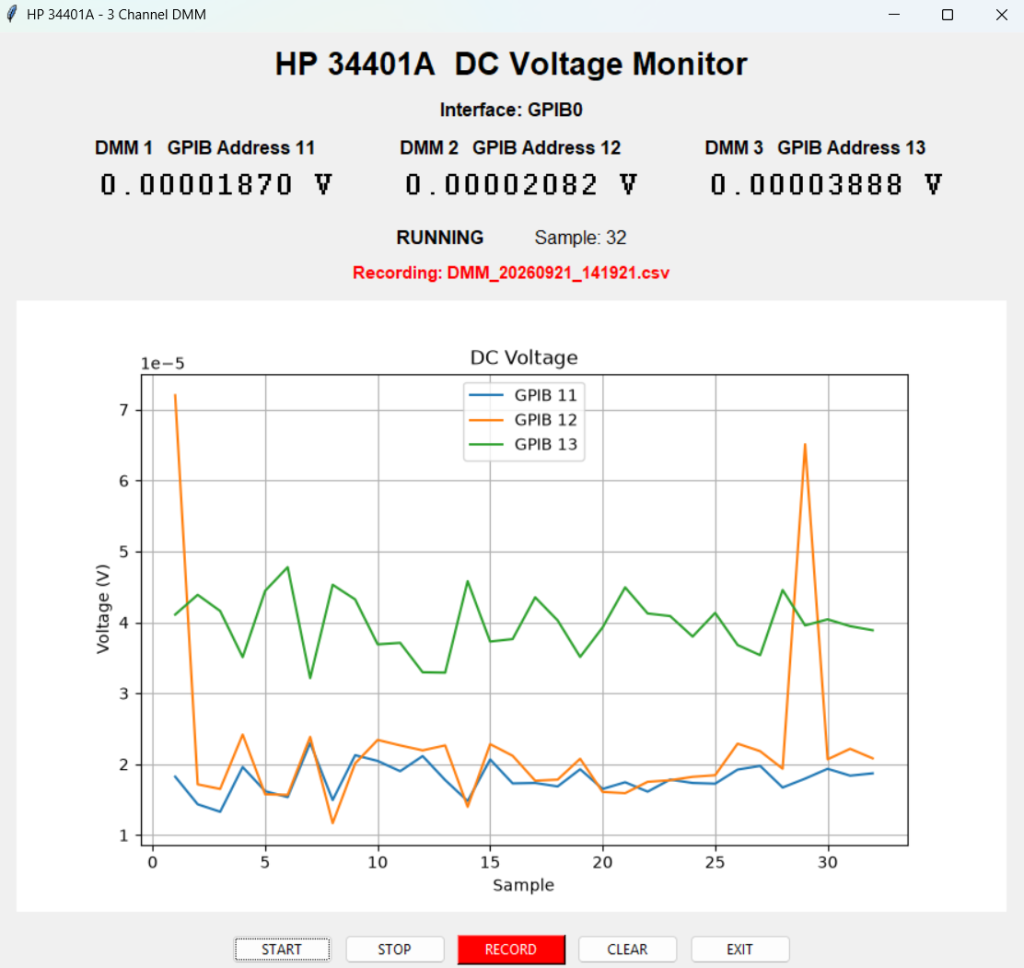
python .\dmm3-gui-graph-record.py
6-3. Output
Recording file (CSV format)
6-4. Python Source Code
Please check the GitHub link below for the full source code.
https://github.com/moriyasum/GPIB/blob/main/dmm3-gui-graph-record.py
Conclusion
The Agilent 82357B used in this project was successfully operated on Windows 11 using Keysight’s official IO Libraries Suite.
Communication was verified with the same PyVISA and Python programs used in the other configurations, including examples using one and three HP 34401A multimeters. The three-instrument GUI/data-logger also operated successfully without requiring changes to the measurement code.
With the IO Libraries Suite installed, the 82357B operated normally using the manufacturer’s standard Windows driver environment. This also demonstrated that the same Python measurement programs could be used with both the NI and Agilent/Keysight GPIB adapters with only the appropriate GPIB interface selection.